Recipe: Slow Cooker Vegetable Soup

Perfect for an easy, hearty dinner!

Whether you live alone or with other people, and whether you cook every day or just once in a while, a slow cooker is one of the best kitchen appliances you can invest in! We have a small, two-quart slow cooker that we bought from Target, and we use it almost every week at school. Slow cooker meals are great for busy schedules – you can just throw everything in the pot, leave it alone for hours, and come back to a low-effort hot dinner! 

“Maybe French peasants weren’t so bad off after all!” ~ Sarah

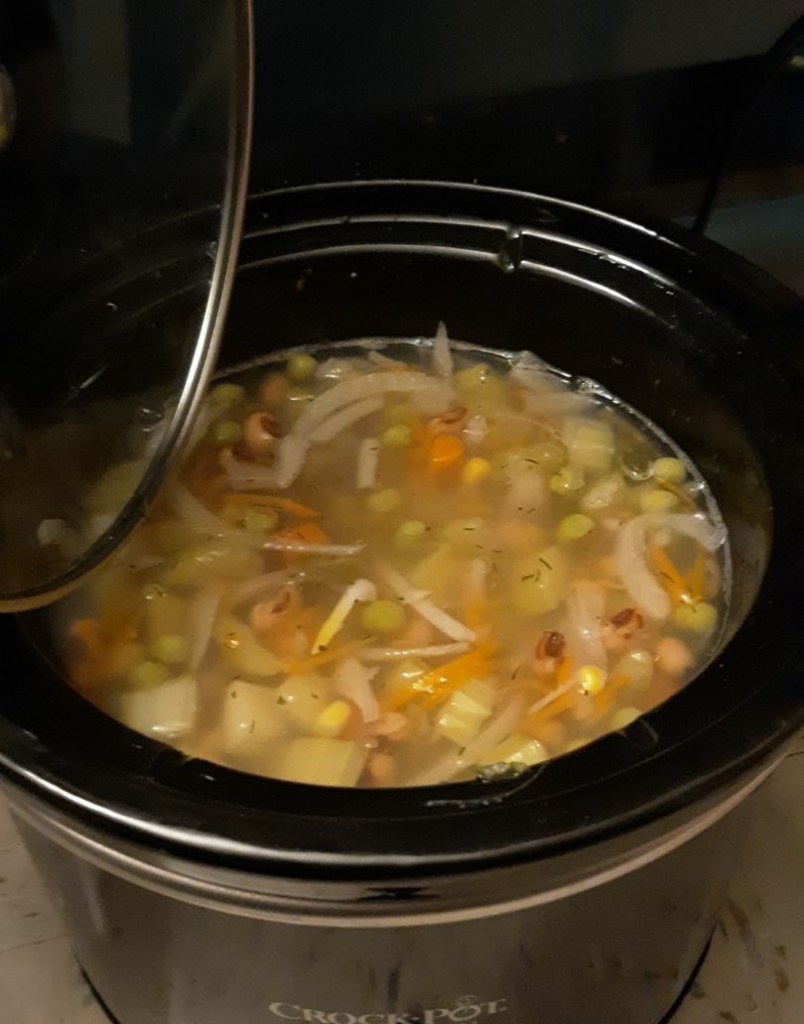
Affectionately termed “peasant soup” by our roommates, this vegetable soup recipe was born out of some leftover frozen veggies we needed to use up. We supplemented them with some fresh vegetables from our campus salad bar, added a seasoning blend and vegetable broth, and let it cook for a few hours while we did homework and ran errands. We love this meal because it’s super simple while also full of healthy ingredients. You can adjust it to use whatever vegetables you have on hand – just think about what ingredients you have and what would taste good together, throw them in the pot with some seasoning and broth, and let it cook! 

A perfect recipe to use up leftover veggies!

Slow Cooker Vegetable Soup (makes 2-4 servings)

Ingredients:

  • Carrots (meal plan or $0.99/lb)*
  • Peas (meal plan or $1.00/bag)*
  • Corn (meal plan or $0.65/can)
  • Celery (meal plan or $1.39/stalk)
  • Black-eyed peas (meal plan or $0.79/can)
  • Onion (meal plan or $0.23/serving)
  • Garlic ($0.03/serving)
  • Vegetable broth ($1.99/box)
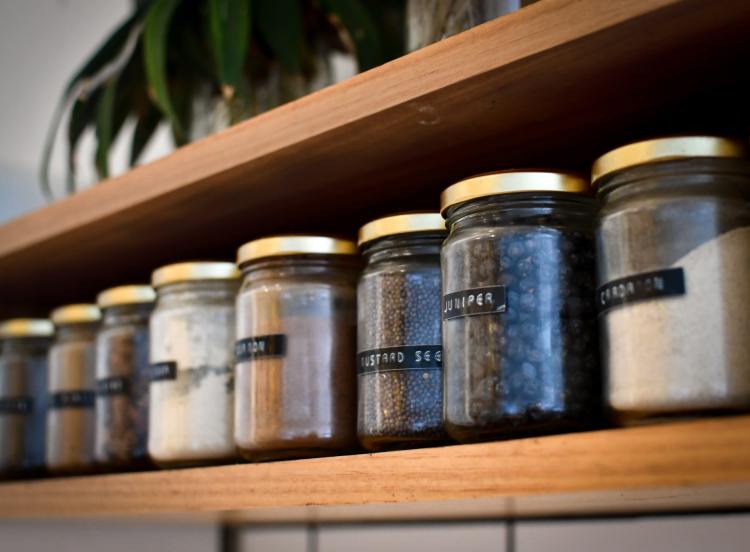
  • Seasoning blend (we recommend Herbs de Provence) ($4.49/jar)

*Another buying option is frozen peas and carrots for $1.00/bag

Supplies:

  • 2-quart slow cooker ($11.99)

Chop vegetables so everything is approximately the same size. Layer in the crockpot, placing the vegetables that take the longest to cook on the bottom (first onion and garlic, then carrots, celery, corn and peas, and black-eyed peas). Layer seasoning blend as you layer the veggies, so that each layer of veggies has some seasoning on top. Pour about a quart of vegetable stock on top – remember that the vegetables will release liquid as they cook down, so adjust the amount of broth you want accordingly. Cook in the crockpot on low for 5-6 hours or on high for 3-4 hours. Enjoy with some crescent rolls or crusty bread! 

❤ Juliana and Sarah

Tips and Tricks: Pantry Staples (part three)

Sarah’s potted herb garden

Part three of our pantry staples series focuses on produce and herbs! It can be hard to know what produce to buy when and how to prioritize spices. If you’re looking to elevate your cooking in simple ways, this is a great place to start!

Produce:

  • Produce items like potatoes, onions, and garlic don’t require fridge space. Potatoes are a great way to stretch a meal when that friend who you’ve been meaning to catch up with conveniently decides to stop by around dinner time… (we’ve all been there!) Onions and garlic are cheap ways to add flavor to a dish, and they last for a long time. We buy fresh bulbs of garlic at the farmer’s market for $1/bulb, which usually lasts about 6 meals. Fresh onions should be stored in a cool, dry place with plenty of ventilation (we made the mistake of storing them in a poorly ventilated area, and it smelled like rotten onions for weeks. We don’t recommend it.)  
  • Refrigerated produce items like cabbage, celery, and cucumbers will last about a week. Cucumbers and celery make good snacks, especially with dips like hummus, and you can get a delicious meal or two from a head of cabbage! 

Herbs:

  • A great idea for fresh herbs is to start an herb garden! Those little containers of herbs at the grocery store can get expensive and you rarely use the whole thing, meaning food and money gets wasted. A small pot works fine for an herb garden, and most Italian herbs such as oregano, basil, and thyme grow well together. Other good herbs to grow are rosemary, parsley, cilantro, and mint. This saves money on flavor when cooking, and it connects you to your food!
  • Sometimes fresh herbs aren’t always the best choice, but all the spice blends at stores can be confusing. The first things you should buy are salt, pepper, garlic powder, and onion powder. These are good staples for any cuisine you might make. We also love paprika, garlic and herb blends, and chili blends –  as you develop your cooking style, you can add to this list and personalize your pantry. 
  • We don’t often recommend packet blends from the store; even though they’re easy, they can be expensive and high in sodium. Instead, try the jar spices at the grocery store. If you’re really ambitious, you can even try to make your own spice blend for a signature chili, taco night, or sheet pan meal! This is what we’ve started doing, and it’s saved tons of money. 

We hope this helps as you shape your pantry! We want to emphasize that everyone is comfortable with different cuisines and flavors, so our recommendations aren’t universal. Instead, they are meant to serve as a starting point for thinking about produce and herbs to keep on hand.

❤ Juliana and Sarah

Recipe: Breakfast Hash

Hash browns, potatoes, chickpeas, mushrooms, and onions make up this yummy breakfast hash!

When our campus dining hall serves hash browns for breakfast, we always grab some extra to make this filling, delicious dish! It can be made with leftover hash browns like we do, or you can make it with tater tots, chopped potatoes, or even leftover french fries. It makes a great breakfast or an easy dinner – serve with applesauce or a simple fruit salad to make a full meal!

A variation of this recipe with bell peppers and zucchini!

This recipe is truly versatile and can be adapted to use whatever ingredients you have on hand. Use potatoes instead of hash browns,  omit the chickpeas, try different kinds of veggies, crack an egg on top of the hash, etc. The staples of the dish are some kind of starch (hash browns, tater tots, potatoes) and vegetables – beyond that, play around with it and make the dish your own!

Giving it a final stir before digging in!

Breakfast Hash (makes 2-4 servings)

Ingredients: 

  • Leftover hash browns or tater tots ($0.14/serving)
  • Chickpeas (optional) ($0.59/can)
  • Cooked ground sausage (optional) ($0.48/serving)
  • Onion  ($0.23/serving)
  • Various vegetables, cut to roughly the same size: 
    • Zucchini ($0.27/serving)
    • Bell peppers ($0.50/serving)
    • Mushrooms ($0.27/serving)
    • Spinach ($0.39/serving)
  • Olive oil ($0.20/serving)
  • Seasoning blend of choice

Supplies: 

  • Skillet ($9.99)
  • Spatula ($0.99)

In a large skillet, drizzle olive oil and saute onion. Add denser vegetables that take more time to cook (mushrooms, zucchini) followed by veggies that take less time to cook (bell peppers). Add seasoning blend at the same time as the veggies. Add the chickpeas and/or cooked sausage (optional, but a good source of protein). Once heated through, add the leftover tater tots/hash browns and cook until everything is hot and cooked thoroughly. Finally, add the spinach and cook until done. Serve immediately and enjoy! 

❤ Juliana and Sarah

Tips and Tricks: Pantry Staples (part two)

Photo by Austin Kehmeier on Unsplash

Part two of our pantry staples series: canned goods! Canned items like beans, chickpeas, tomatoes, and tuna or chicken are a great way to build up your pantry. They’re usually cheaper than buying food fresh, they’ll last for ages, and they’re super versatile. Foods like nut butters, jams and jellies, and condiments can also fall into this shelf stable category; even though you probably won’t use the whole container at once like you would a can of beans or tomatoes, they’re similar enough that we tend to store them together. Read our list below to find out some basic canned goods to stock up on! 

  • We always have a couple cans of beans floating around our dorm room! Kidney beans, black beans, and white beans are what we usually buy; you can use them in soups and chili for some added protein, or make beans and rice! Our go-to recipe calls for a can or two of beans, some Minute Rice, and peppers and tomatoes you stole from the dining hall bought with your university meal plan!
  • We’ve made another post about chickpeas, so we won’t go on about them here, but suffice it to say we cook with chickpeas at least 1-2 times a week! We never have less than two cans in our pantry and we always buy some more whenever we’re at the store. One of our favorite dinners is roasted chickpeas, potatoes, broccoli, and cauliflower – we just dump all the ingredients in a ziploc bag and coat with some olive oil and a seasoning blend, then roast everything on a sheet pan for 20-25 minutes at 425℉. 
  • Canned tomatoes are another food we always have – they’re essential to a good chili or beans and rice! Since we usually use them in spicier foods, we like buying ones that have hot peppers mixed in with the tomatoes. You can also add them to spaghetti sauce with some chopped vegetables to put some extra veggies on your plate!
  • Obviously this isn’t one for vegans or vegetarians, but if you eat meat, canned chicken and tuna are great to keep in your pantry! Chicken salad or tuna salad make easy, filling lunches, especially spread on a tortilla and paired with chips and a piece of fruit. All you need for an easy tuna salad is a can of tuna, chopped olives, and mayonnaise to taste; chicken salad is just chicken, celery, mayonnaise, and some pepper and garlic salt!
  • Nut butters, like peanut butter and almond butter, are one of the best foods you can have in your kitchen! They’re packed with protein and can be used for so many different things: spread some on a tortilla with bananas and chocolate chips, drop a dollop on top of your oatmeal, or just make yourself a classic PB&J!

❤ Juliana and Sarah

Recipe: Roasted Veggies

Photo by Louis Hansel @shotsoflouis on Unsplash

We probably make this roasted veggie recipe at least once a week during the school year! It’s easy and basic, but super delicious. You can roast practically any combination of vegetables: broccoli, cauliflower, carrots, zucchini, asparagus, tomatoes, and bell peppers are some of our favorites. Usually, we also decide to roast chickpeas or potatoes with the veggies to make a more filling dish – drain the chickpeas and pat dry with a paper towel, or chop potatoes to the same size as your vegetables, and prepare them to roast the exact same way.

Excuse the poor quality image! We’re still learning how to take good food pics 🙂

We usually roast broccoli, cauliflower, and onions when making this dish. We tend to pick up veggies from our campus salad bar – if you have a university meal plan, you should definitely take advantage of dining locations like these! Filling up a salad box with food to cook with later is one of our favorite ways to gather ingredients. Why go to the store and buy food with real money, when you can use the meal plan that you’ve already paid for? Check local markets for vegetables too; lots of times you can find fresh produce for inexpensive prices. If you do buy your veggies at the store, a word to the wise: frozen vegetables are great for pretty much everything except roasting! Because they’ve been frozen, they’ll release more water as they cook and won’t get crispy. The same goes for canned vegetables – they’re great in soups and casseroles, but you should always get fresh vegetables to roast! 

For a dish we make so often, we don’t have a lot of pictures! Enjoy this blurry one that tasted better than it looks!

Roasted Veggies (2-4 servings)

Ingredients:

  • Onion (meal plan or $0.23/serving) 
  • Minced garlic ($0.03/serving)
  • Olive oil ($0.20/serving)
  • Seasoning mix – we recommend: 
    • Garlic and herb mix OR Mediterranean blend
  • Any mixture of vegetables – we recommend: 
    • Broccoli ($0.36/serving)
    • Cauliflower ($0.36/serving)

Supplies

  • Sheet pan ($5.00)
  • Spatula ($0.99)
  • Mixing bowl ($6.99) OR Ziploc bag ($0.10) 
  • Olive oil cooking spray ($1.39)

Preheat oven to 425-450°F. Chop vegetables to desired size (make sure all the veggies are about the same size, so everything cooks evenly). In mixing bowl or ziploc bag, combine vegetables, olive oil, and seasonings. Spray sheet pan with cooking spray and spread the vegetables evenly over the pan; roast for 30-40 minutes, checking and stirring occasionally.

❤ Juliana and Sarah

Tips and Tricks: Pantry Staples (part one)

Photo by heather mckean on Unsplash

Having a fully stocked pantry always makes it easier to pull dinner together – but what does a fully stocked pantry look like? We’re putting together a series of posts that talk about good staples to have on hand in your kitchen, plus some tips on what to do with them! Today we’re starting out with dry goods like pasta, rice, and dry beans, and over the next couple weeks we’ll talk about foods like canned goods, frozen food, herbs and spices, and refrigerated foods. Below we’ve made a list of some dry goods that are helpful for building up your own pantry!

  • Flour and sugar are great if you like to bake things like bread, cakes, or cookies from scratch – however, if you don’t bake that often or if you have limited storage space, you might want to skip on these ingredients for the time being. We usually have some on hand because we like making homemade bread, but they’re definitely not the first pantry staple college students reach for! 
  • A good food for college pantries, however, is rice! It makes a great side dish when topped with butter and herbs, or you can use it as a base for a curry or a stir fry. If you’re not confident cooking rice on the stove, you can always get Minute Rice – it’s not as healthy, but it’s fast and easy to make in a microwave! Roast some vegetables and chickpeas to go with it, and you’ve got a filling, rounded meal!
  • We mentioned dry beans briefly in our post last Wednesday – while we don’t cook with them that often at school, due to limited space and time, they’re super inexpensive and will last for ages! They’re a little time-consuming to prepare, but not difficult – usually all you have to do is soak them overnight or cook them in a pressure cooker to soften them. If you have the space and time to use them, they’re a great addition to your pantry! 
  • Pasta is another good food to have on hand. It’s super versatile, and you can use it as a filling base for lots of different flavors. Classic spaghetti and meatballs, pasta with a creamy garlic sauce, homemade macaroni and cheese, chicken noodle soup… there are so many great recipes you can make with pasta! If you prefer fewer carbs in your meals, you can also make spaghetti squash or ‘zoodles’ from vegetables and use them the same way you would use pasta! 

❤ Juliana and Sarah

Recipe: Gnocchi with Spinach and Mushrooms

When it comes to making a quick Italian-stlye dinner, nothing is better than pre-packaged gnocchi. These little pillows of potato heaven will please everyone you are feeding, and they are super versatile, shelf stable, and often inexpensive! Our favorite way to prepare gnocchi is with sauteed spinach and mushrooms. We cook the gnocchi ahead of time, and brown it in butter to make it slightly crispy and extra yummy. This might sound ambitious in a dorm kitchen, but we promise that it is doable and delicious!

Image of gnocchi in a pot with spinach and mushrooms
The hardest part about this dish is resisting the urge to snack on the gnocchi while everything else cooks!

Gnocchi doesn’t seem to be an ingredient college students usually reach for, but we cook with it all the time! It’s similar to pasta in the way you can use it as a base for different flavor palates: you can make gnocchi with tomato sauce and fresh basil, alfredo sauce and grated cheese, sauteed with different vegetables, or even roasted with tomatoes, peppers, and onions like this blogger did! Prepackaged gnocchi is fairly inexpensive – it usually costs less than $2/package. We’ve even found some on sale for $0.99! It’s a great pantry staple to have on hand, so stock up if you ever find a good deal!

Image of a stovetop with a pot of gnocchi on one burner and a pan of spinach on another
Cook the gnocchi first and let it brown while the spinach and mushrooms cook down, then combine and serve!

Gnocchi with Spinach and Mushrooms (makes four servings)

Ingredients:

  • Prepackaged gnocchi ($0.62/serving)
  • Spinach (meal plan or $0.39/serving)
  • Mushrooms (meal plan or $0.75/serving)
  • Onion (meal plan or $0.23/serving)
  • Olive oil ($0.20/serving) OR butter (vegan butter or regular) ($0.14/serving)
  • Minced garlic ($0.03/serving)
  • Herbs of your choice (we prefer an Italian herb blend)

Supplies:

  • Skillet ($9.99)
  • Large pot ($9.89)
  • Strainer ($2.99)

Cook gnocchi according to package directions (this should take about 2-3 minutes in boiling water. You’ll know they’re done when they float to the top). In a skillet, saute the onion, garlic, herbs, and mushrooms in butter or olive oil until they are almost done (they should be pretty tender) then add the spinach. When the gnocchi is cooked, drain it and add it back to the pot with butter or olive oil and let it brown while the vegetables cook. Once all gnocchi have reached desired crispiness, toss the vegetable mix with the crispy gnocchi and the herb blend. Serve and enjoy!

❤ Juliana and Sarah

Tips and Tricks: Thrifty Shopping

Photo by nrd on Unsplash

Grocery shopping can get expensive, especially for college students! Money can be tight a lot of the time, and if you’re an inexperienced shopper, you might find yourself buying food that you won’t actually use. Planning ahead of time and shopping smart will save you a lot of money in the long run! Here are some of our favorite tricks for saving money while grocery shopping: 

  • If you tend to grocery shop before thinking of recipes to make, check out the app Ibotta! It shows current deals on a variety of groceries, and if you’re willing to try new things Ibotta can help you find new ideas for meals. You can also look online for manufacturer’s coupons – these will work on specific brands across any store! Before we shop, we usually check Ibotta and our local grocery store flyer or shopper so we can make our shopping list based on weekly sales. 
  • If your town or city has a local market, stop in and see if you can find anything there! Depending on your location and the season, food markets could have fresh produce, homemade bread, local eggs and dairy, or preserves and canned goods. Oftentimes buying fresh, local food ends up being cheaper than doing your shopping at a grocery store, and it’s usually better quality too. Our college town has a biweekly farmer’s market where we’ve gotten food like cabbage, garlic, bread, cheese, tomato sauce, and even homemade potato chips for a lot less than they would be at a grocery store.  
  • Bring your own bags! Lots of stores give you a discount on your purchase for every reusable bag you bring. Some stores even charge for plastic bags now, and although this doesn’t seem like a big cost in the moment, every little bit helps with saving money. Reusable bags are great to take to farmer’s markets too, and they also help the environment – something that’s always a big plus in our dorm! If you do get plastic bags, keep them and use them for something else, like trash bags for small waste bins. This saves money on trash bags – but reusable bags are still the best way to go! 
  • If you find a good sale on frozen veggies (and have enough freezer space), stock up! Frozen food will stay good for a long time, which saves money on throwing out old produce. Frozen fruit is great for smoothies, or you can thaw it and use it like you normally would! Frozen veggies are also super versatile, and they’re just as good as fresh ones. Some of our favorites include: broccoli, spinach, mixed veggies, and cauliflower. Although frozen vegetables tend to get soggy if you try to roast them, they’re great steamed or sauteed! 
  • Speaking of groceries that last a long time, canned goods are another great staple to have on hand! Beans and tomatoes are usually less than $1/can and can be used in a variety of recipes, so as long as you don’t have a long walk back home, they’re great to stock up on. Recipes that use canned goods are often quick and convenient, so they’re good to have if you find yourself in a pinch. Dry beans are usually slightly cheaper than canned but tend to need more prep before you can use them. We like cans because they store well in a small dorm, but if you have the space and time to prep your ingredients, you can save even more money by buying them dry!

❤ Juliana and Sarah

Recipe: Easy Garlic Knots

A perfect snack or side dish!

We’re back with another crescent roll favorite – garlic knots! We made these for the first time just a couple weeks ago, and they were so good we had to share the recipe ASAP. These garlic knots are super easy to pull together as a side dish, appetizer, or just as an afternoon snack. All it takes is crescent roll dough, minced garlic, butter, and your favorite herb blend (we used Italian herbs – 10/10 would recommend!).

The realities of college cooking…

We’ve posted on here before about how great crescent rolls are to have on hand, and this recipe is just one more example of what a delicious and versatile ingredient they are. Anytime you find them on sale, make sure to pick up a few containers. They’ll last in the fridge for ages and you can do so much with them! For this recipe, we used one container of crescent rolls to make eight garlic knots. We’ve been buying fresh garlic at a local market ($1/bulb!) so we minced our own to make these, but pre-packaged, refrigerated minced garlic works great too. The butter and herbs were ingredients we already had in our dorm kitchen. Italian herbs and butter are both great to have on hand since so many recipes call for them – pick up some herbs the next time you’re at the store, and keep your packet drawer fully stocked with butter!

They were so good, we only managed to snap a few pictures before they were gone!

Garlic Knots (makes 8) 

Ingredients:

  • Crescent rolls ($2.19/container)
  • Butter (substitute vegan butter if desired) (packet drawer or $0.76/eight knots)
    • To taste; we used approx. ¼ of a container or 10 packets
  • Minced garlic ($0.10/clove) 
    • 2 cloves
  • Italian seasoning  ($1.29/container) 

Supplies:

  • Sheet pan ($5.00) 
  • Microwave-safe bowl ($1.99) 
  • Cutting board ($4.00)
  • Knife ($3.99)

Open the crescent rolls and separate the triangles of dough. Form each triangle into a long rope, tie them into knots, and place them on the sheet pan. In a microwave-safe bowl, dump butter, minced garlic, and italian seasoning and microwave until butter is melted entirely. Stir to incorporate everything and drizzle butter mixture on top of the knots. Bake according to directions on the crescent roll packaging.

Enjoy!

❤ Juliana and Sarah

Tips and Tricks: Packet Drawer

Image of salt and pepper shakers and sugar packets
Photo by James Coleman on Unsplash

One amazing investment for our dorm kitchen has been our packet drawer! Sauces and condiments can get expensive and take up valuable space in your minifridge, while condiment packets often come free with fast food or takeout and don’t need to be refrigerated. We know from experience that college students often get takeout and fast food more than they might like, and we always try to make the most of these meals by saving the packets we get to use later. This works especially well when it comes to Chinese takeout – how many soy sauce, duck sauce, and mustard packets are you left with when you’re done eating? Save those packets for later to use in your cooking! Here are some tips to get started with your own packet drawer:

  • The packet drawer doesn’t have to be a whole drawer, necessarily (we know college students are often short on space!) – just some kind of container to hold all those condiment packets we inevitably end up with. Boxes, bags, or that one tupperware that’s missing a lid all work great! 
  • If the restaurant you’re at has condiment packets sitting out (or if they ask if you want any for your meal) always take a few extra to replenish your stash – within reason, of course! The same goes for your college dining places. Our campus coffee shop usually has sugar and butter packets sitting out, so whenever our stash is getting low we take a few with our orders to add to our packet drawer!
  • Our favorite packets to keep on hand include: soy sauce, butter, sugar, and mayonnaise! These are ingredients that we use a lot, but not enough to justify buying an entire container of them. Fresh veggies and a handful of soy sauce packets will go a long way towards a good stir fry, while butter and sugar are good to have on hand for desserts! Mayonnaise is one that we don’t use as much, but you can add it to canned tuna with some olives and garlic powder to make tuna salad, or leftover chicken with celery and herbs for chicken salad!

❤ Juliana and Sarah

Design a site like this with WordPress.com
Get started